
How to make a Pet Tag, with almost no money
Nobody wants to lose their pet, yet sadly, millions of pets lose their way back home every year.
To combat this, there are a lot of different products on the market. For example, you can get:
A regular engraved pet tag
A smart QR code pet tag
A GPS tracking device
The one problem with all of these is however, is that they all cost quite a bit of money… but what if you want something cheaper - like really cheap?
That’s why we decided to try and create our own Pet Tag, using 2 pictures and a simple product from AliExpress.
Here’s what it looks like:
Here is what you’ll need:
Any website URL (Even your instagram profile is fine)
3€
About 5 minutes to set up 2 pictures.
Patience to wait for the keyring to arrive
Take a website URL
First thing you’re going to need is a place, where people can contact you.
You can take your pets Instagram page, your own Facebook profile page or even your email.
This page will be put on the tag, so that when people find your lost pet, then they can scan the QR code and write to you.
For us at Pocket Puppy School, our options were:
We chose the last one for our dog, because we like to go the extra mile. But honestly, any social media profile would be fine as well.
Once you have chosen your page, copy it.
2. Create a QR code
QR codes might seem magical, but actually they are super simple things that you can create in a minute.
You can search “QR code generator” in Google and pick any of the websites that pop up.
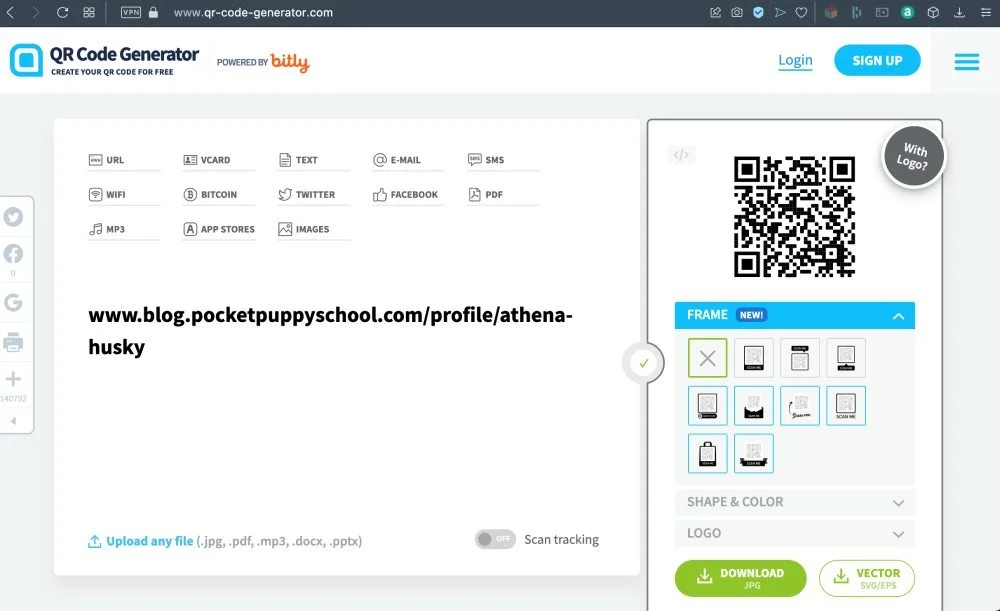
The first one for us was www.qr-code-generator.com.
Simply put your URL into the website and download the QR code image.
But again, it doesn’t matter which QR code generator website you choose, they all do the same thing.
As long as you can download the QR code picture, everything is perfect.
3. Make the QR code a little bit smaller
Now that you’ve got a picture of the QR code, we are almost done, but there’s only one problem.
The keyring that we want to order is circle shaped. And if you would cut a circle out of your picture, then you would cut into the picture, like so:

To prevent that, we need to edit the picture to make it smaller.
This is the “hardest” part of the build, but we’ll guide you through it.
If you’ve ever used photoshop or even made pictures smaller in Google Docs or Microsoft Word then this will be easy for you.
To edit the picture, first download this picture that we’ve created for you.
This will serve as a guideline to show how much you need to make your QR code smaller.

Then, open up www.freephototool.com.
Click on:
File -> Open… -> Back of Pet Tag.jpg
Now the picture should be open in the tool.
Then take your QR code picture, and simply drag it to the center of the grey circle.
Now, If you grab the edges, you can stretch the picture bigger, or make it smaller, as you see fit. Just make sure that the picture stays within the grey circle.
Then simply click on:
File -> Export as -> JPG -> Save
And you’re done!
In case that was a bit hard to follow, then here’s a short demo of us doing it. It took us less than a minute.

4. Order the keychain
To make our pet ID, we simply ordered a custom keychain from AliExpress.
We used this AliExpress product, but you might find something similar in other stores as well.

Before ordering it however, we made a picture for the front too.
You can download it and use it too, or you can make your own if you know how and want to.
In the end, you should have two pictures: One for the front, and one for the back.
Then we simply ordered the keychain on AliExpress, and sent both of the pictures in their messaging system.

And a few weeks later, we got it!
All we had to do was put it on our dog’s collar and we were done!
Now if our dog would ever get lost, then people can scan in the QR code with their phone, open up the Profile page and get in contact with us easily.
Plus, I think it looks really cute!

Feel free to create your own designs and send us your results! You can see links to our socials down below.
Haven’t heard about Pocket Puppy School before?

Pocket Puppy School is a completely free dog training app. Our mission is to make information about raising dogs accessible to everyone in the world.
But in addition to our app, we have a blog (that you are currently reading 🤓) where we talk all things about dogs.
We post some informational and fun content to our Instagram page and believe it or not, we even have a merch store. 🥹 In the store you can get a t-shirt or a hoodie with your own dog picture that we will make into an awesome design.
Feel free to check out all of our channels, and if you have any questions, leave a comment down below.
Thank you!